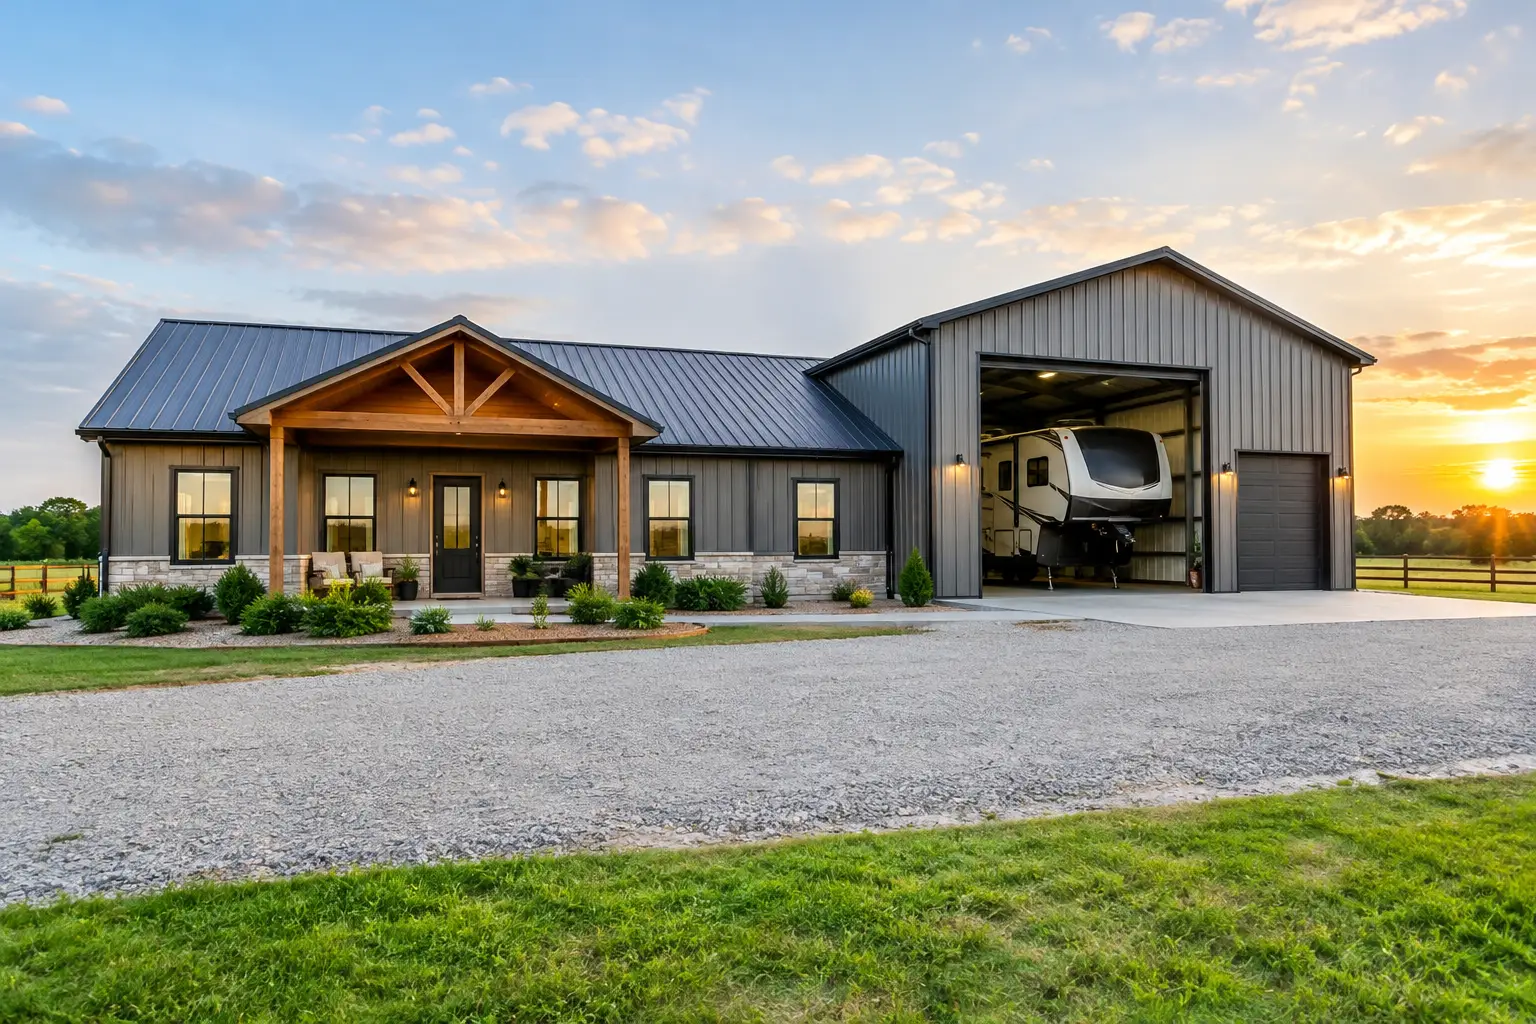
An RV that sits outside for one winter usually makes the storage decision for you. Sun, wind, hail, moisture, and constant cleaning take a toll. A 2 bed 2 bath with RV storage gives you a practical way to protect the coach while creating a full-time home, a weekend place, or a flexible property base in one pre-engineered steel building.
The best projects do not start with a stock building size. They start with the RV’s actual measurements, how you will use the living space, and the limits of the site. A few feet added in the right place can make daily parking easy. A few feet missed can leave an expensive RV bay too tight to use comfortably.
Start With the RV Bay, Not the Bedroom Count
Two bedrooms and two bathrooms can fit a range of footprints. RV storage is less forgiving. Measure the RV’s overall length, width with mirrors, tallest point, slide-out clearance, and the space needed to turn in, back in, and open storage compartments.
Many motorhomes need a door around 14 feet high, but the door height alone is not the full answer. Door framing, roof structure, lights, and interior clearance all affect whether the coach can enter safely. A building professional can help match the opening and eave height to the RV you own now and the one you may own later.
Length matters just as much. A bay that barely fits the RV may not leave room for walking around it, accessing the rear ladder, or storing hoses, tools, bicycles, and seasonal equipment. If you want a workbench or a small service area, establish that space before the shell is quoted.
A useful rule is to plan the RV zone as a true functional bay rather than an oversized garage. You need room to park, open compartments, carry supplies, and maintain the vehicle without constantly moving it back outside.
Common layout directions
A side-by-side layout places the home and RV bay next to each other under one roofline. This can create a straightforward separation between quiet living space and vehicle activity. It often works well on wider lots, especially when the RV entrance can face the driveway without crossing the home’s main entry.
An end-to-end layout places the RV bay behind or in front of the living area. This can suit a narrower parcel, but it requires careful attention to driveway depth and turning radius. The RV should have a direct approach to its overhead door.
Another option is an L-shaped arrangement, with the living wing creating a more private outdoor area beside the storage wing. It can be attractive on larger rural sites, although the roof design, foundation layout, and structural package may be more involved than a simple rectangle.
There is no universal best option. A 40-foot RV on an open acreage has different needs than a 45-foot coach on a tighter residential lot. Site access usually decides which layout is truly practical.
Design the 2 Bed 2 Bath With RV Storage for Daily Life
The two-bedroom portion should feel like a home, not like leftover space beside a garage bay. A common approach is to place the primary suite at one end of the residence and the secondary bedroom and bath at the opposite end. That gives family members, guests, or tenants more privacy.
Keep the kitchen, living area, and primary entrance away from the noisiest wall of the RV bay when possible. The storage bay may be used for loading, minor maintenance, air compressors, or early departures. A buffer zone such as a mudroom, laundry room, pantry, mechanical room, or hallway can reduce sound transfer and create useful storage.
The connection between home and RV storage deserves extra planning. An interior access door is convenient in rain and bad weather, but it should be selected and detailed for the applicable fire and building-code requirements. The garage and living areas also need proper separation, ventilation considerations, and carefully planned mechanical systems. Local code rules vary, so confirm requirements before finalizing the plan.
Bathrooms should be located with plumbing efficiency in mind. Placing the bathrooms, laundry, and kitchen near a shared plumbing wall can reduce the length and complexity of water and drain lines. It also makes future repairs easier to manage.
Choose Structural Dimensions Before Finishing Details
With a red-iron, pre-engineered steel building, the frame is designed around the building width, length, eave height, roof loads, openings, and local conditions. That means large overhead doors, wide clear spans, and a residential wing should be discussed early, not added after a basic shell is selected.
Clear-span framing is particularly useful for RV storage because it can create open interior space without columns interrupting the parking area. The exact span and framing approach should be designed for the project, local wind exposure, snow loads, and building code requirements.
Think through these decisions before requesting pricing:
- The RV’s measured height, length, width, and required door opening
- Whether the RV bay needs a wash area, floor drain, utility sink, or service space
- The number and size of exterior doors, windows, and overhead doors
- The preferred separation between the residence and vehicle storage
- Future needs, such as a second RV, trailer, boat, or enclosed workshop area
Do not assume a taller building is always the right answer. More height can affect framing, wall panels, insulation needs, and total project cost. The goal is enough clearance for safe use and future flexibility without paying for space that will not serve the property.
Foundation, Site Prep, and Utilities Can Shape the Budget
The steel building is only one part of the project. A 2 bed 2 bath with RV storage typically requires a properly designed foundation or slab, site grading, drainage planning, utility connections, permits, and interior build-out. Those items can vary significantly by region and site.
The slab should be planned around the RV’s weight and the intended living-space construction. It may need thickened areas, reinforcement, plumbing rough-ins, vapor protection, and carefully located anchor points for the steel frame. This is not the stage for guesswork. Your local foundation professional and building team should work from the engineered building requirements and the site’s soil conditions.
Drainage is equally important. Water that runs toward overhead doors or collects against the slab can create problems long after construction is finished. Establish the building elevation, driveway approach, and runoff path before the concrete is poured.
Utilities can be simple on a developed lot or a major budget item on rural land. Ask early about electric service, water source, septic requirements, gas availability, and internet service if the building will be a full-time residence or work location.
Insulation and Moisture Control Are Not Add-Ons
A steel shell needs a complete insulation and moisture-control strategy, particularly when one section is conditioned living space and another is unconditioned RV storage. Condensation can form when warm, moist air reaches cold metal surfaces. The right solution depends on climate, roof and wall assembly, HVAC approach, and how often the RV bay will be heated or cooled.
Living areas need code-appropriate insulation, air sealing, and ventilation. The RV bay may need different insulation levels depending on whether you are protecting plumbing, working in the space, or storing temperature-sensitive supplies. If you plan to heat the bay occasionally, account for that use in the design instead of treating it as a later upgrade.
Separate HVAC zones are often worth discussing. You may want steady comfort in the home without conditioning a large RV bay to the same level every day. The right setup depends on your climate and usage pattern.
Price the Whole Project, Not Just the Metal Shell
A low building-package number can be misleading if it excludes engineering, delivery, erection, concrete, doors, insulation, interior framing, plumbing, electrical work, HVAC, finishes, site work, and permits. For a livable steel building, the finished budget matters more than the price of the frame alone.
Request pricing with a clear scope. Provide the building dimensions, location, intended use, RV measurements, desired door sizes, eave height, insulation goals, and whether you need a finished residence, a shell, or a phased build. That gives building professionals enough information to identify major cost drivers and avoid an unrealistic starting number.
A simple rectangular footprint, sensible door placement, and grouped plumbing can help control cost. On the other hand, complex rooflines, oversized openings, long utility runs, steep sites, and high-end interior finishes can move the budget quickly. Neither approach is wrong, but each should be intentional.
Check Permits Before You Commit
Residential use, RV storage, zoning setbacks, driveway access, septic, and fire separation can all involve local approvals. Some jurisdictions have clear rules for metal building homes; others may require additional review. If the building will be used as a residence, verify the applicable code path and inspection process before ordering materials.
Bring a preliminary site plan to those conversations. Showing the building location, access drive, utility direction, and setbacks can answer many questions early. It is far easier to adjust a layout on paper than after concrete and steel have been scheduled.
Turn Key Floor Plans offers hundreds of customizable floor plans, and eligible stock plans can receive 10% off with code STOCKPLANSLUKE. Use any plan as a starting point, then make sure the RV bay, site access, and local requirements are addressed before moving forward.
When you are ready to compare real options, visit TurnkeyFloorPlans.com, click Get a Free Building Quote, and submit your dimensions, location, intended use, and project details. The quote request is free and carries no obligation. A clear starting scope gives you the right path to a building that protects your RV and works as a home for years to come.
Leave a Reply