Last Updated: November 18, 2026
Quick Summary
The most effective way to start how to maximize storage in RV garages is to inventory what you own and sort it by how often you use it. Then measure your RV’s full height, length, and width, including mirrors and roof racks, and plan clear walkways around it. Use vertical space with rated shelving, wall rails, and overhead racks anchored into structural framing.
- Inventory every item and group it by how often you use it.
- Add mirrors, roof racks, and antennas to your RV’s height measurement.
- Keep at least two to three feet of clearance on the sides of the RV.
- Check each shelf’s manufacturer load rating before you buy or install.
- Anchor overhead racks into structural framing, never drywall anchors or ductwork.
Table of Contents
- Start With a Storage Inventory and Layout Plan
- Using Vertical Space in Your RV Garage
- RV Garage Shelving Options and What Each One Holds
- Overhead Storage for RV Garages: Load Limits and Safety
- RV Garage Storage Ideas for Walls, Doors, and Corners
- DIY RV Storage Ideas and Comparing Storage Systems by Cost and Effort
- Planning Your Next Step for a Storage-Ready RV Garage
- Frequently Asked Questions
Start With a Storage Inventory and Layout Plan
Before you buy a single shelf, take stock of what you actually need to store.
List everything, tools, camping gear, tires, chemicals, sports equipment, seasonal items, and group by how often you use it: weekly items at eye level, yearly items high or in the back.
Next, sketch a simple layout. Mark the RV’s parking spot, walkways, and door swing, and keep a clear path to the driver’s side door and the entry door.
- List every item and how often you use it
- Mark the RV’s footprint and the door swing on your plan
- Keep at least a few feet of walkway around the RV
Measuring Clearance Around Your RV
Measure your RV before you plan anything else. Record overall height, length, and width, and add mirrors, roof racks, and antennas to the height, many owners forget these and find out too late that the rig does not fit.
Leave room to open doors fully and walk around the rig; plan for at least two to three feet of clearance on the sides. Check the garage door height too, since a tall Class A motorhome needs more headroom than most standard doors allow.
Watch out: wall storage can cut into the clearance you need to open RV doors. Measure again after you install shelves.
Using Vertical Space in Your RV Garage
Most RV garages have more unused height than floor space. Walls and the area above the RV give you room to store gear without losing parking space.
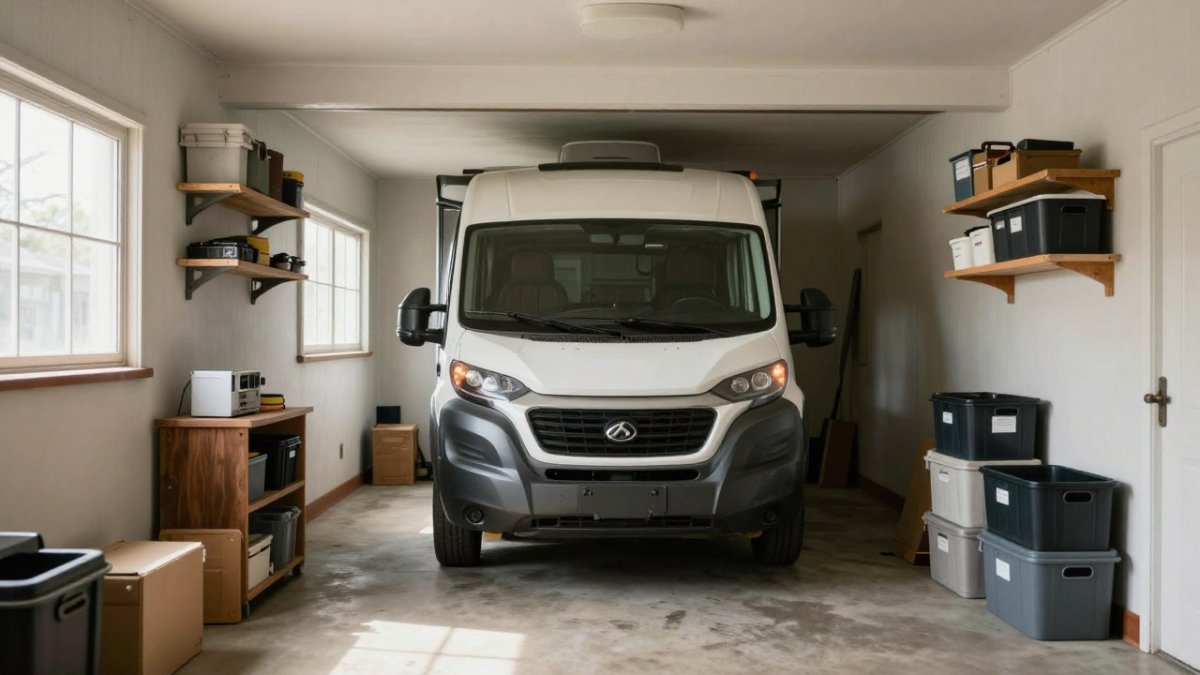
Start with the tallest walls. Mount heavy-duty shelving or cabinets high enough to stay clear of the RV’s roof, and keep rarely used items on the highest shelves.
Sort vertical systems by weight and frequency. Heavy tools and bins belong at waist height or lower; light, seasonal items can go near the ceiling.
- Use wall-mounted rails for bikes, ladders, and long tools
- Stack clear bins on shelves so you can see the labels
- Keep heavy items low to avoid lifting strain and tipping risk
RV Garage Shelving Options and What Each One Holds
Shelving is the backbone of most RV garage storage. The right type depends on what you plan to store and how much weight each shelf must carry, check the manufacturer’s load rating before you buy.
Steel shelving units handle heavy tools, paint cans, and storage totes well. Wood or composite shelves suit lighter items like camping gear and linens.
Heavy-duty shelving needs solid anchoring. Bolt the units to wall studs or steel framing where possible, do not rely on drywall anchors for heavy loads.
- Steel units: best for tools, paint, and heavy totes
- Wood or composite: best for light camping gear and supplies
- Wire shelves: best for airflow and items that need ventilation
Overhead Storage for RV Garages: Load Limits and Safety
Overhead storage is the single biggest space win in most RV garages, and the single biggest place where owners get into trouble. Because every ceiling rack, loft, or hanging shelf must be anchored for its load, careful planning is essential to garage overhead storage installation.
RV garages are often built tall, so the space above the rig is large and tempting. It is also where a dropped item lands on a windshield, a roof, or a person. Plan the load before you plan the shelf.
How Overhead Load Ratings Actually Work
Overhead storage systems are often rated in more than one way, such as per linear foot and as a total system limit. Ask the manufacturer what each rating means and what it assumes about fastener spacing and attachment to structure.
Published ratings assume the rack is anchored into structural framing at the manufacturer’s specified spacing. Follow the instructions exactly, and do not substitute drywall anchors or construction adhesive for structural fasteners.
Anchoring Into Metal Building Framing
In a red-iron or pre-engineered metal building, the roof is supported by steel purlins spanning between rigid frames, and the walls are framed with steel girts.
The safer approach is to span between two rigid frames or columns with a dedicated beam or header sized for the storage load, then hang the rack from that. If you are unsure how your building is framed, ask the manufacturer or a local engineer before drilling.
- Anchor overhead racks into framing sized for the load, not into roof panels or ceiling liner
- Span between rigid frames or columns when the purlins are not rated for hanging loads
- Keep fastener spacing at or tighter than the manufacturer’s instructions
Distributing Weight and Keeping It Reachable
Even a properly rated rack can fail if the load is concentrated in one spot.
Access matters as much as capacity. Keep the top shelf within comfortable reach from a stable step stool or rolling ladder, and never climb on the RV, a bin, or a chair to reach overhead storage.
Watch out: never store fuel, propane cylinders, solvents, or other flammables overhead, and never hang anything above the RV’s roof where it could fall onto the rig, the windshield, or a person below.
Lofts, Mezzanines, and When to Get Engineering Help
A loft or mezzanine is a walking surface with a live load, and it needs a designed structure, beams, columns, decking, guardrails, and a code-compliant stair or ladder.
If overhead storage is part of your plan from the start, tell your builder early. A metal building can be designed with the extra framing, clear height, and door placement to support a loft or heavy overhead racks, far easier to design in than to retrofit later.
RV Garage Storage Ideas for Walls, Doors, and Corners
Doors and corners often go unused. The back of the garage door can hold a pegboard or hook panel for hand tools and cords.
Corners suit tall, narrow cabinets or corner shelving units. These spots are hard to use for anything else, so they are ideal for storage that stays out of the way.
Keep walkways clear. Storage that blocks the door or the path to the RV defeats the purpose of the layout plan you made earlier.
- Use the back of the door for hooks and pegboard
- Add tall corner cabinets for brooms, hoses, and cleaning supplies
- Mount a rail along a wall for hanging ladders and folding chairs
DIY RV Storage Ideas and Comparing Storage Systems by Cost and Effort
Once you know what you are storing and how much clearance you have, the next decision is which storage system to install. Most owners end up with a mix, but it helps to compare the main options on weight capacity, space used, installation effort, and how easily they can be changed later.
The table below compares the common systems on those criteria. It does not list prices because costs vary widely by region, material, and size, get local quotes for anything you are seriously considering.
| System | Typical capacity | Space used | Installation effort | Best for |
|---|---|---|---|---|
| DIY lumber shelving | Light to moderate; depends on build quality and anchoring | Floor-standing, 18-24 in deep | Moderate; requires cutting, fastening, and anchoring | Budget-minded owners with carpentry skills |
| Ready-made steel shelving units | Moderate to heavy; rated per shelf | Floor-standing, 18-24 in deep | Low; assemble and anchor | Tools, totes, paint, heavy gear |
| Wall-mounted steel rails and hooks | Light to moderate; rated per hook or per rail | Wall only, no floor footprint | Low to moderate; needs framing | Bikes, ladders, long tools, cords |
| Overhead ceiling racks | Light to moderate; rated per linear foot and total | Overhead, above the RV | Moderate to high; needs structural anchoring | Seasonal, bulky, lightweight items |
| Loft or mezzanine | Heavy; designed live load | Overhead, with columns and stairs | High; permit and engineering likely | Long-term bulk storage, workshop space |
| Modular bin and cabinet systems | Light to moderate | Floor or wall | Low; snap or bolt together | Reconfigurable, changing inventories |
Matching the System to the Load
The most common mistake is buying a system for its footprint instead of its rating. A wall rail that holds 50 pounds per hook is fine for a ladder and useless for a set of tires.
A second common mistake is overloading the floor. Concentrated point loads from a loaded shelving unit or a loft column are a different case from the RV’s weight on the slab.
Installation Effort by System
DIY lumber shelving is the most labor-intensive option. It requires measuring, cutting, fastening, and, most importantly, anchoring into framing.
Ready-made steel units are the fastest path to usable storage.
Wall rails and hooks are quick to install but depend on what is behind the wall.
Overhead racks and lofts are the highest-effort options and the ones most likely to need a permit or engineering review.
A Simple Decision Path
If you want storage this weekend and your loads are light, start with wall rails and a ready-made steel shelving unit. If you have bulky seasonal gear and clear height above the RV, add an overhead rack anchored into framing.
Watch out: do not mix systems casually, a hook rated for a ladder should not be used for a loaded tool bag, and a shelf rated for linens should not hold paint.
Planning Your Next Step for a Storage-Ready RV Garage
A well-planned RV garage holds more gear, protects your rig, and stays easy to use. Start with your inventory, measure your clearance, and choose shelving and overhead systems that match your loads.
If you are planning a new building with an RV garage built in from the start, a free building quote can help you compare realistic options for size, layout, and storage.
Frequently Asked Questions
How much clearance should I leave around an RV in a garage?
Leave enough room to open doors fully, walk around the vehicle, and reach stored items without climbing over the RV. Many owners keep at least 3 feet on the sides and rear for access, and more if you plan to work on the RV or open a slide-out. Measure the length, width, and height of your RV including roof racks and antennas, then add those dimensions to your floor plan before buying shelving. Check that overhead racks sit above the roofline with room to spare, because a rack that scrapes the top of the RV will cause damage and limit where you can park.
Are overhead storage racks safe to use in an RV garage?
Overhead racks can be safe when they are rated for the load you plan to store, mounted into ceiling joists or structural members rather than drywall alone, and kept clear of the RV’s height. Check the manufacturer’s weight rating and divide it by the number of mounting points to understand the load per anchor. Store lighter, seasonal items overhead and keep heavy tools, fuel, and batteries at waist height or lower. If you are building in a metal structure, confirm with your builder that the purlins or framing can carry the added weight before installing heavy racks.
What should I store on the walls of an RV garage?
Wall space works well for items you use often and can see at a glance: hoses, extension cords, camp chairs, bikes, and lightweight hand tools. Use heavy-duty hooks, French cleat systems, or pegboard rated for the weight, and keep the lowest items at a height that does not block the RV’s doors or slides. Avoid hanging items where they will be hit when the RV is pulled in or out. Group related gear together so you can find it quickly without unpacking the whole wall.
How do I organize tools and camping gear in an RV garage?
Sort gear by how often you use it. Keep daily-use items near the entry door, store seasonal camping equipment on overhead racks or high shelves, and place heavy items like generators or tool chests on lower shelves or along the back wall. Label every bin with its contents and a location code so you can retrieve items without moving others. Clear bins with lids protect gear from dust and pests better than open baskets, and a simple inventory list taped inside a cabinet door keeps the system working over time.

Leave a Reply