Table of Contents
- Step 1: Lock Down Your Pre-Construction Planning Checklist
- Step 2: Build a Realistic Custom Home Construction Timeline
- Step 3: Choose a General Contractor Who Prevents Construction Delays
- Step 4: Understand How to Handle Construction Change Orders
- Step 5: Manage Building Permits and Site Inspections Without Stalling
- Step 6: Reduce Material Lead Time and Subcontractor Coordination Problems
- Step 7: Plan for Weather Mitigation and Site Logistics
- Step 8: Protect Yourself With a Contingency Fund and Legal Safeguards
- Frequently Asked Questions
Last Updated: September 30, 2026
Step 1: Lock Down Your Pre-Construction Planning Checklist
Avoiding construction delays on custom builds starts long before anyone breaks ground. A solid pre-construction planning checklist is the single best tool for protecting your timeline, and it costs nothing but time up front.
Avoiding construction delays on custom builds starts long before anyone breaks ground. A solid pre-construction planning checklist is the single best tool for protecting your timeline, and it costs nothing but time up front. Here is what your checklist should cover before you hire anyone: Comprehensive preparation remains the most effective strategy for preventing residential construction delays by ensuring every logistical detail is addressed before the foundation is poured.
- Finalize architectural plans and get them stamped
- Complete a soil test and survey on your lot
- Confirm your buildable area and setback lines
- Line up your construction financing
- Get three contractor bids in writing
- Map out your permit submission window
That last item matters more than most first-time builders expect. Many towns take weeks to review a permit package, and that clock does not start until your plans are complete.
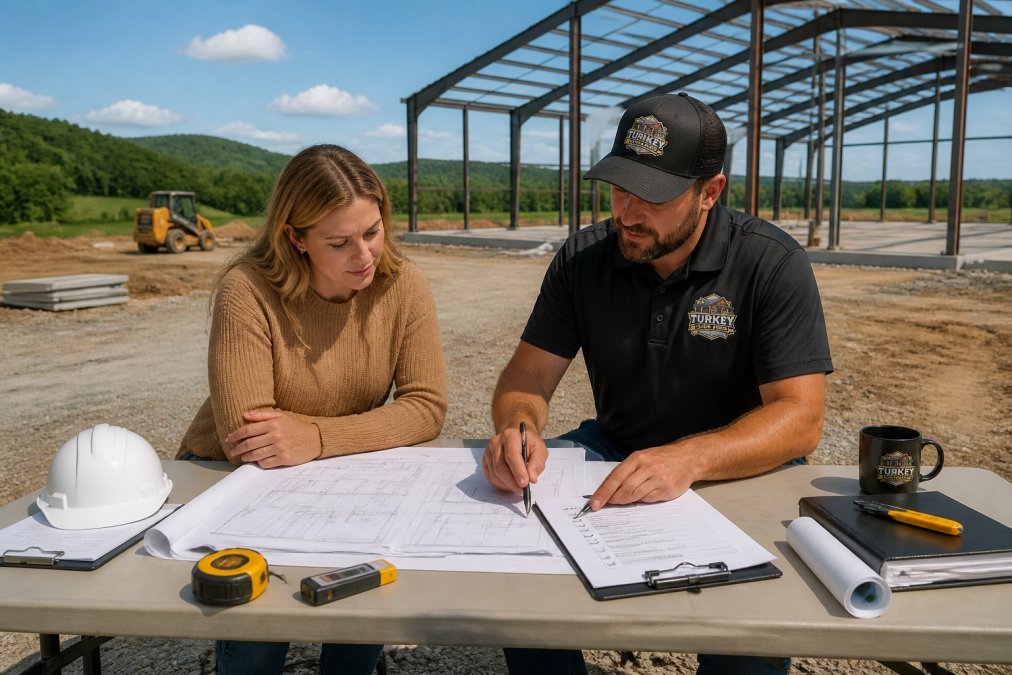
Finalize Architectural Plans and Site Preparation Before Breaking Ground
Design changes made after the foundation is poured are the most expensive kind. Every wall you move later forces a cascade of rework: framing, electrical, plumbing, and inspections.
Site preparation deserves the same discipline. Clearing, grading, and driveway work often take longer than the build itself on rural lots. A common mistake is assuming your land is “ready to go.” In practice, most raw lots need drainage work, a driveway cut, and utility trenching before a single post goes in.
Order your soil test and survey in the same week. If your soil report comes back showing poor bearing capacity, your foundation plan changes, and you want that news before your architect finishes the drawings, not after.
Step 2: Build a Realistic Custom Home Construction Timeline
A realistic custom home construction timeline is your best defense against construction delays. Most delays are not accidents; they are the predictable result of an optimistic schedule.
Build your timeline backward from your move-in date. Then add buffer to every phase that depends on someone outside your control: the county, the utility company, the truss supplier.
A typical schedule breaks into these phases:
- Design and permitting: 8-16 weeks
- Site prep and foundation: 3-5 weeks
- Framing and roofing: 4-6 weeks
- Rough-in trades: 4-6 weeks
- Insulation, drywall, finishes: 8-12 weeks
- Final inspections and punch list: 2-4 weeks
Those ranges are wide on purpose. Treat any contractor who quotes you a single fixed number for the whole build with caution.
Map the Critical Path and Set Milestone Tracking Points
The critical path is the chain of tasks where any slip pushes your whole completion date. On most builds, that chain runs from permitting through foundation, framing, and rough-in inspections.
Track it with milestone points you can actually verify:
| Milestone | What Confirms It | Why It Matters |
|---|---|---|
| Permit issued | Stamped approval letter | Nothing starts without it |
| Foundation poured | Inspection sign-off | Framing cannot begin |
| Dry-in complete | Roof and windows installed | Interior trades can start |
| Rough-in passed | Electrical and plumbing inspection | Walls can close |
| Final inspection | Certificate of occupancy | You can move in |
Never let a subcontractor start the next phase “on a handshake” before the prior inspection passes. If an inspector later flags rough-in work that is already covered by drywall, you pay to open the walls again.
Step 3: Choose a General Contractor Who Prevents Construction Delays
The right general contractor prevents construction delays before they happen. The wrong one explains them to you afterward.
Look for a builder who specializes in your building type. Metal building and barndominium construction has different tolerances and trade sequencing than a traditional stick-built house. A framing crew that has never set steel columns will slow your whole schedule.
Ask every candidate these questions:
- How many projects like mine have you completed?
- Who is my single point of contact during the build?
- How do you handle subcontractor scheduling and no-shows?
- Can I see your last three completed builds?
A common mistake is choosing the lowest bid. The lowest bid usually wins by cutting the contingency line, and that is exactly the line that absorbs surprises.
This is where Turn Key Floorplans helps. Our platform connects you with a network of general contractors who specialize in metal buildings and barndominiums, filtered by the state you are building in. You can compare designs and connect with builders through our service.
Your contractor’s communication habits during the bidding phase predict their communication during the build. Slow, vague answers now become slow, vague answers when your framing crew is waiting on a decision.
Step 4: Understand How to Handle Construction Change Orders
Knowing how to handle construction change orders is the difference between a small adjustment and a budget disaster. A change order is any written modification to the scope, price, or schedule after the contract is signed.
Handle every change order the same way:
- Get the request in writing, even for small items
- Ask for the cost and time impact before approving
- Confirm whether it affects the critical path
- Sign only after you understand both numbers
- Keep a running log of every approved change
Verbal change orders are the number one source of disputes on custom builds. If it is not on paper, it did not happen.
Scope Creep, Budget Overruns, and Contractual Obligations
Scope creep is the slow expansion of your project through dozens of small “while we’re at it” decisions. Each one feels harmless. Together they can push a build well past its original budget.
Your contract should spell out how changes get priced, who approves them, and how they affect the completion date. Read that section before you sign, not after the first dispute.
Set a personal change-order threshold. Below it, you approve on the spot. Above it, you sleep on it for 24 hours. Most impulse upgrades look less essential the next morning.
Step 5: Manage Building Permits and Site Inspections Without Stalling
Building permits and site inspections stall more builds than bad weather does. The fix is treating paperwork as a scheduled task, not an afterthought.
Submit a complete permit package the first time. Missing documents are the most common reason for review delays, and each resubmission restarts the clock.
Then build an inspection calendar into your schedule:
- Foundation inspection before the pour
- Framing inspection before insulation
- Rough-in inspections for electrical, plumbing, and mechanical
- Final inspection before occupancy
Call for each inspection as soon as the work is ready. Do not wait for a convenient moment, because inspection queues fill up fast in busy seasons.
Step 6: Reduce Material Lead Time and Subcontractor Coordination Problems
Material lead times and subcontractor coordination are the two quiet killers of custom build schedules. Neither shows up on a Gantt chart until it is too late.
Order long-lead items early. Windows, custom doors, metal roofing panels, and specialty trusses often take the longest to arrive. Lock those orders in as soon as your plans are final.
For subcontractor coordination, insist on a shared schedule. Every trade should know when they are expected and who comes before them. Overlapping trades in the same space cause rework and arguments.
General Contractors – Sign Up Here →
Do not store delivered materials on an unsecured rural lot without a plan. Theft and weather damage to materials that arrive early can cost you both money and weeks.
Step 7: Plan for Weather Mitigation and Site Logistics
Weather mitigation is not about controlling the sky. It is about sequencing work so rain and cold cost you days instead of weeks.
Schedule exterior work for your region’s dry season. Keep interior tasks ready to pull forward when weather shuts down the site. A builder who can shift crews indoors during a wet week keeps your project moving.
Site logistics matter just as much. On a rural lot, plan for:
- A stable, all-weather access road for concrete trucks
- Staging areas for materials away from the build pad
- Temporary power and water access
- Drainage so your site does not turn into mud
Mud is the enemy of every rural build. One week of rain on an unpaved access road can block a concrete pour and push your foundation schedule back a month.
Build a Weather-Trigger Plan Before the First Rain
Most owners react to weather. The builders who protect their schedule plan for it. Before ground breaks, agree on a written weather-trigger plan with your contractor that answers three questions:
- What work can move indoors? Rough-in, cabinet layout, trim prep, and material staging can often proceed while exterior work is stalled. Identify those tasks in advance so a wet week is not a lost week.
- What is the decision deadline? If rain is forecast for the pour day, who decides to postpone, and by what hour? A decision made the night before saves a crew mobilization fee. A decision made the morning of usually does not.
- What is the remobilization cost? Concrete, framing, and roofing crews often charge a fee to return after a weather stop. Know that number up front so you can weigh it against the cost of waiting.
Track local rainfall history for your build month, not just the forecast. If your region’s wettest stretch overlaps your foundation and framing phases, build extra buffer into those weeks specifically rather than spreading it evenly across the schedule.
Post-Delay Recovery: How to Get Back on Schedule After a Stall
This is the part most guides skip. Once a delay has already happened, weather, permit, or otherwise, the goal shifts from prevention to recovery. A short, disciplined recovery plan can pull back days that would otherwise be lost for good.
1. Re-baseline the schedule, do not just push it. When a delay hits, the temptation is to slide every downstream date by the same number of days. That is usually wrong. Rebuild the schedule from the current date forward and look for tasks that can now run in parallel instead of in sequence.
2. Compress the critical path, not everything. Only tasks on the critical path affect your completion date. Adding crew or hours to a non-critical task burns money without buying back time. Ask your contractor which tasks are truly on the critical path before authorizing any acceleration.
3. Look for overlap opportunities. Rough-in trades, insulation, and drywall are often run strictly in sequence. With the right sequencing and inspection timing, some of that work can overlap. Ask what can be safely parallelized without violating inspection requirements.
4. Use the punch list as a buffer. Final inspections and punch-list work are where leftover days often hide. If you are behind, start the punch list earlier and in sections rather than waiting for a single final walkthrough.
5. Decide what to cut, not just what to speed up. When recovery time runs out, the honest choice is often to defer a non-essential finish rather than pay overtime to install it. A deferred upgrade is cheaper than an accelerated schedule.
Do not let a recovery push skip an inspection. Compressing the schedule by covering rough-in work before it passes inspection trades a few days now for a wall-opening repair later, a net loss every time.
6. Document the delay and its cause. Note the date the delay started, what caused it, and what it cost. That record matters if the delay turns into a contract dispute, and it is the same file you will rely on if you ever need to invoke a liquidated damages clause.
Step 8: Protect Yourself With a Contingency Fund and Legal Safeguards
A contingency fund and clear legal protections are what keep a delay from becoming a financial crisis. Set aside a reserve for the unexpected, and treat it as untouchable for upgrades.
Most builders suggest a contingency sized as a percentage of your total budget. The exact figure depends on your project’s complexity and how much is custom, so ask your contractor what they recommend for a build like yours.
Size Your Contingency by Delay Type, Not Just a Flat Percentage
A single flat percentage hides the real risk. Different delay types hit your budget in different ways, so it helps to think about the reserve in buckets:
| Delay Type | How It Hits the Budget | Where the Money Goes |
|---|---|---|
| Permit and inspection delays | Carrying costs | Construction loan interest, lot taxes, insurance on an unfinished structure |
| Material and supply delays | Price escalation and storage | Re-quotes on out-of-stock items, re-delivery fees, temporary storage or security |
| Subcontractor no-shows | Schedule compression | Overtime, expedited shipping, added supervision to recover days |
| Weather delays | Idle labor and equipment | Crew standby, rented equipment sitting on site, remobilization fees |
| Change-order creep | Scope expansion | Direct cost of the change plus the downstream rework it triggers |
A common pattern is that permit and weather delays cost you mostly in carrying costs, while material and change-order delays cost you in hard dollars. That distinction matters when you decide how much reserve to hold and when to release it.
Ask your lender how construction loan interest is drawn during a stall. On many custom builds, interest keeps accruing even when no work is happening, so a two-month permit delay is not free, it is a real line item you can plan for.
Contract Language That Actually Protects You
On the legal side, your contract should cover:
- A defined completion date and how extensions are granted
- A liquidated damages clause if the builder runs late
- Lien waivers from subcontractors and suppliers
- A clear warranty period and what it covers
- A dispute resolution process
Two of those deserve a closer look because they are the ones owners most often sign without understanding.
Liquidated damages. A liquidated damages clause sets a fixed, pre-agreed amount the builder owes you for each day the project runs past the completion date, when the delay is the builder’s fault. It is not a penalty, it is a genuine estimate of your added costs, such as rent, storage, or loan interest, agreed to up front so neither side has to prove damages later. The clause only works if it defines what counts as a builder-caused delay and what counts as an excusable delay (weather, acts of government, owner-requested changes). Read both lists.
Lien waivers. A lien waiver is a document in which a subcontractor or supplier gives up the right to file a mechanics lien against your property in exchange for payment. Collect a conditional waiver with each progress payment and a final unconditional waiver when the trade is fully paid. Without them, a subcontractor your builder failed to pay can file a lien against your home even though you paid the builder in full.
Excusable vs. compensable delay. Your contract should separate delays that excuse the builder from the completion date (excusable) from delays that also entitle you to money back (compensable). Weather is usually excusable but not compensable. A builder-caused delay is typically both. If the contract blurs the two, you have no leverage when a delay is clearly the builder’s fault.
A completion date with no enforcement mechanism is a suggestion. If your contract has no liquidated damages clause and no defined excusable-delay list, ask for both before you sign, not after the first slip.
Verify the Builder Before You Sign
Check your state’s contractor licensing board to confirm your builder’s license and complaint history before you sign. The FTC’s consumer guidance on home improvement contracts explains what a fair contract should include, and the HUD resources for homebuyers can point you to local housing counselors if you need a second opinion on financing.
Document everything as the build progresses: photos, inspection reports, change orders, and payment records. If a dispute ever arises, that file is your evidence. Keep signed lien waivers in the same folder as your payment receipts so the two always match up.
OSHA construction safety standards are worth a quick read too, since a safe site is a productive site, and safety incidents are one of the most disruptive delays a build can face.
Frequently Asked Questions
What are considered excusable delays in construction?
Excusable delays are events outside anyone’s control that push the schedule without penalizing the contractor. Common examples include severe weather, natural disasters, government permitting backlogs, and sudden material shortages. These delays typically entitle the contractor to a time extension but not extra money. Your contract should define exactly which events qualify as excusable and how they must be documented. Without that language, a dispute over what counts is almost guaranteed. Review this clause with your general contractor before signing anything.
How do material shortages impact custom home timelines?
Material shortages hit custom builds harder than production homes because every component is specified for your design. When a window package or metal roofing panel is backordered, the framing crew may finish but the building stays open to weather. That triggers cascading delays across subcontractor coordination and site inspections. To reduce the risk, order long-lead items during pre-construction planning and confirm delivery dates in writing. Build a two to four week buffer into your custom home construction timeline for any material with a lead time over six weeks.
What can you do if a contractor takes too long?
Start by reviewing your contract’s timeline and completion clauses. Send written notice of the delay, citing the specific milestone that was missed. If the contractor does not respond with a recovery plan, you may have grounds to withhold payment for incomplete work or terminate for cause, depending on your state’s rules. Document everything: dates, photos, and communication records. Many disputes resolve once a contractor sees you understand the contractual obligations. For larger projects, a construction attorney can send a demand letter that gets faster results than repeated phone calls.
What role does pre-construction planning play in avoiding construction delays?
Pre-construction planning is where most construction delays are prevented or created. Finalizing architectural plans, completing site preparation, securing building permits, and locking in material orders before breaking ground removes the four biggest sources of schedule slippage. A thorough pre-construction planning checklist also forces stakeholder alignment on budget, scope, and finish selections early, which cuts down on change orders later. Builders who rush this phase typically spend two to three times as long fixing problems during construction than they would have spent planning upfront.