Table of Contents
- What the Metal Building Home Construction Process Actually Involves
- Step 1: Planning, Design, and Zoning Compliance
- Step 2: Metal Building Foundation Requirements and Site Prep
- Step 3: Engineering, Permits, and Load Requirements
- Step 4: Delivery and Structural Erection of Prefab Kits
- Step 5: Framing, Trusses, and Panel Installation
- Step 6: Metal Building Insulation and Interior Finishing
- Hiring a General Contractor for Barndominiums: What to Look For
- Barndominium Construction Timeline: What to Expect Month by Month
- DIY vs. Professional Contractor: A Decision Matrix
- Frequently Asked Questions
Last Updated: September 15, 2026
What the Metal Building Home Construction Process Actually Involves
The metal building home construction process moves through six phases: planning and zoning, site prep and foundation, engineering and permits, delivery and erection, framing and panels, then insulation and interior finishing. Each phase has its own approval gates, and skipping one is how budgets blow up. This guide from Turn Key Floorplans walks through all six in order.
Most first-time builders assume the hard part is assembling the structure. It isn’t.
The hard part is everything that happens before a single piece of steel arrives: zoning approval, foundation design, load calculations, and permit review. Get those wrong and the build stalls for months. Get them right and the erection phase, which is genuinely fast, runs like clockwork.
A metal building home is a residential structure built from pre-engineered steel components, assembled on site rather than stick-framed from lumber. That distinction drives nearly every decision downstream, from foundation type to how you insulate the walls.
Below, we’ll show you exactly what each phase requires, where the hidden delays live, and how to decide what you can do yourself versus what needs a licensed pro.
Step 1: Planning, Design, and Zoning Compliance
Planning comes first because zoning can kill a project before it starts. Before you buy plans or pour anything, confirm that your lot allows a metal building home and understand what your local jurisdiction requires for residential steel construction.
Start with these checks:
- Confirm the parcel’s zoning designation permits residential use
- Request setback requirements (how far the structure must sit from property lines)
- Ask about minimum square footage and height limits
- Verify whether the county requires a site survey before permit application
- Check floodplain maps, since elevation certificates may be required
The FEMA Flood Map Service Center lets you check your parcel’s flood zone before you commit to a design. This matters because floodplain construction triggers additional engineering and elevation requirements.
Navigating HOA Rules and Local Zoning
Homeowners association rules can be stricter than county zoning, and they’re easy to miss. An HOA may restrict exterior materials, roof pitch, minimum square footage, or even prohibit metal exteriors outright.
Read the covenants before you buy land, not after. Request written architectural approval in advance, and keep that approval in your project file. A verbal “should be fine” from a board member carries no weight when the build is underway.
Step 2: Metal Building Foundation Requirements and Site Prep
Metal building foundation requirements depend on soil conditions, frost depth, and the structure’s load-bearing design. A geotechnical report tells your engineer what the ground can support, and that report drives whether you need a slab, piers, or both.
Site prep typically includes:
- Clearing and grubbing the building pad
- Site excavation to reach stable, compacted subgrade
- Grading for positive drainage away from the footprint
- Installing foundation footings and anchor bolts set to the engineer’s plan
- Compaction testing before the concrete pour
Moisture control starts here. Poor drainage around a slab leads to heaving, cracking, and long-term foundation problems that no amount of interior finishing will hide.
Concrete Slab vs. Pier and Beam
A concrete slab is the most common choice for metal building homes because it’s cost-effective and provides a continuous anchor surface for the steel frame. Pier and beam costs more but lifts the structure above grade, which helps on sloped lots, in flood-prone areas, and where soil movement is a concern.
For a shop-house layout with heavy equipment, the slab must be engineered for those point loads, not just residential occupancy.
Skipping the geotechnical report to save time is a common mistake. If the soil turns out to be expansive clay, you’ll be repairing a cracked slab within a few years, and that repair costs far more than the report would have.
Step 3: Engineering, Permits, and Load Requirements
Engineering and permitting run in parallel and both take longer than most first-time builders expect. Your engineer stamps the structural drawings, and your jurisdiction reviews them against local building codes before issuing a permit.
What the engineer calculates:
- Wind and snow load requirements for your specific location
- Seismic considerations where applicable
- Anchorage and foundation connection details
- Structural framing member sizing
- Roof pitch and drainage capacity
The International Code Council publishes the model codes most jurisdictions adopt, though your local amendments govern. Ask your building department which code edition applies to your permit application.
Submit complete drawings the first time. Incomplete submittals get returned, and each review cycle adds weeks.
Step 4: Delivery and Structural Erection of Prefab Kits
Delivery and erection are the fastest phases of the entire project. Once the foundation is cured and inspected, a competent erection crew can stand the primary frame in days, not weeks.
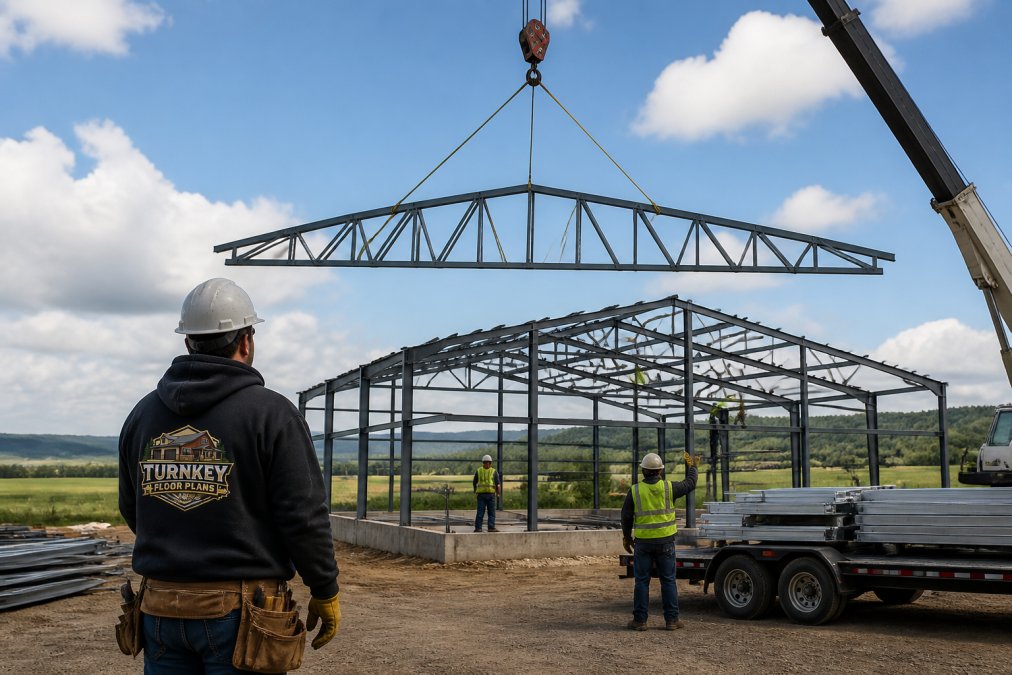
Prefab kits arrive as numbered, labeled components with an assembly guide. Your job is to verify the shipment against the bill of materials before the crew starts. Missing fasteners and hardware stall a build faster than anything else.
Sequence for erection:
- Stage components in assembly order near the pad
- Set anchor bolts and verify alignment
- Erect primary rigid frames and brace them
- Install purlins and girts
- Tighten all connections to the engineer’s torque specification
Galvanized steel components resist corrosion, which matters for long-term durability in humid or coastal climates.
Photograph every pallet before you sign the delivery receipt. If a component arrives damaged, the freight carrier’s liability ends at signature, and replacement lead times can run weeks.
Step 5: Framing, Trusses, and Panel Installation
Framing and panel installation convert the bare frame into a weather-tight building envelope. Truss assembly follows the erection sequence in the assembly guide, and panel installation closes the structure in. Coordinating these labor-intensive phases requires a clear understanding of the metal building installation timeline to ensure that each structural component is secured before the next stage begins.
Key steps:
General Contractors – Sign Up Here →
- Complete secondary structural framing (purlins, girts, bracing)
- Install roof panels from the eave up, lapping in the direction of prevailing weather
- Fasten wall panels with the specified fasteners and hardware
- Seal all penetrations and closures
- Install gutters, downspouts, and trim
Roof pitch affects both drainage and panel selection. Low-slope roofs need different sealants and closure details than steeper pitches.
Structural integrity depends on following the engineer’s fastener schedule exactly. Substituting shorter screws or skipping fasteners at panel edges is a shortcut that shows up as leaks and panel lift during high winds.
Step 6: Metal Building Insulation and Interior Finishing
Metal building insulation and interior finishing determine whether the home feels comfortable and performs efficiently. Steel conducts heat roughly 300 times faster than wood, so every place a purlin or girt touches the exterior panel becomes a thermal bridge, a direct path for heat to move through the assembly. Solving that is the central design problem, and it is the part of a metal home build that most generic guides skip entirely.
Insulation R-Values by Climate Zone
The U.S. Department of Energy publishes recommended insulation R-value ranges by climate zone, and those ranges are the defensible target for your wall and roof assemblies. As a working reference for metal homes:
| Climate Zone | Wall R-Value Target | Roof/Ceiling R-Value Target |
|---|---|---|
| 1-2 (hot) | R-13 to R-15 | R-30 to R-38 |
| 3-4 (mixed) | R-15 to R-20 | R-38 to R-49 |
| 5-6 (cold) | R-20 to R-25 | R-49 to R-60 |
| 7-8 (very cold) | R-25 to R-30 | R-60+ |
These are assembly targets, not product labels. A fiberglass batt rated R-19 compressed into a 6-inch girt cavity delivers less than its nominal value, and a batt installed between girts leaves the girt itself uninsulated, a continuous thermal bridge that can cut effective R-value by 30% or more. That is why metal home builders layer systems rather than rely on a single product.
Insulation Approaches and Where Each Fits
- Fiberglass batt between girts and purlins, lowest upfront cost, but leaves thermal bridging at every framing member. Best paired with a continuous layer.
- Rigid foam board, installed as a continuous layer outside or inside the framing, it breaks the thermal bridge. Polyiso and EPS are common; thickness drives R-value (roughly R-5 to R-6.5 per inch depending on product and temperature).
- Spray foam, closed-cell spray foam delivers roughly R-6 to R-7 per inch and doubles as an air seal, which matters because air leakage through panel seams is a major efficiency loss in metal buildings. Higher cost, but it often eliminates the need for a separate vapor barrier.
- Reflective radiant barriers, effective in hot climates for reducing radiant heat gain through roof panels, but they are not a substitute for conductive insulation. Treat them as a supplement.
The strongest assemblies combine a continuous rigid foam or spray foam layer with batt or blown-in fill in the cavity. That layered approach addresses both conduction (through the steel) and convection (through air gaps).
Ask your builder to detail the wall and roof assembly in cross-section before construction starts. If the drawing shows batt insulation touching the exterior panel with no continuous layer, you have a thermal bridge problem that will show up as high heating and cooling bills, not as a visible defect.
Vapor Control and Air Sealing
In mixed and cold climates, the vapor retarder goes on the warm side of the assembly. In hot, humid climates, the strategy flips, you want the assembly to dry to the interior and you may need a vapor-permeable approach. Getting this wrong traps moisture inside the wall and leads to corrosion of the steel framing, which is far more expensive to fix than the insulation itself.
Air sealing is the other half of the job. Panel seams, closures, and penetrations are the leak paths. A blower-door test after insulation and before drywall quantifies how tight the envelope actually is and gives you a number to compare against your energy model.
Interior Build-Out
Interior finishing then proceeds like any home: framing for interior walls where needed, rough-in plumbing and electrical, drywall or paneling, flooring, and final fixtures. Two metal-specific notes:
- Electrical rough-in, running wiring through steel framing requires grommets or conduit at every penetration to prevent the steel edge from abrading the wire jacket. This is a code requirement in most jurisdictions and a common inspection failure point.
- Hanging drywall or paneling, steel studs and girts accept standard fasteners, but you need the right screw type and length for the gauge of steel. Self-drilling screws sized for the framing gauge prevent stripped connections.
Cladding choices on the exterior affect maintenance and appearance over decades, so pick materials you are willing to maintain. Painted steel panels, for example, typically carry a finish warranty measured in decades but still need periodic inspection of fasteners and sealants, a topic covered in the maintenance discussion below.
Hiring a General Contractor for Barndominiums: What to Look For
Hiring a general contractor for barndominiums requires verifying metal building experience specifically, not just general residential experience. A contractor who has only built stick-frame homes will underestimate erection sequencing and steel-specific detailing.
Ask these questions before signing:
- How many metal building homes have you completed?
- Do you subcontract erection, or is it in-house?
- Can you provide references from builds finished in the last two years?
- How do you handle change orders and schedule slips?
- Are you licensed and insured in this state?
Turn Key Floorplans connects clients with a network of general contractors who specialize in metal buildings and barndominiums across various states, simplifying the journey from concept to a successfully built custom home.
The single biggest predictor of a smooth build is contractor experience with steel, not the lowest bid. A slightly higher quote from a proven metal building contractor usually costs less in the end.
Barndominium Construction Timeline: What to Expect Month by Month
A barndominium construction timeline typically runs longer than a conventional build because permitting and engineering add front-end time, while erection compresses the middle. Treat these phases as overlapping where your jurisdiction allows.
| Phase | Typical Duration | What Happens |
|---|---|---|
| Planning, design, zoning | 4-10 weeks | Site survey, HOA approval, plan selection |
| Foundation and site prep | 3-6 weeks | Excavation, footings, slab cure |
| Engineering and permits | 4-12 weeks | Stamped drawings, code review, permit issue |
| Delivery and erection | 1-3 weeks | Frame standing, braced, inspected |
| Framing and panels | 2-4 weeks | Envelope closed, weather-tight |
| Insulation and finishing | 8-16 weeks | Mechanical rough-in, drywall, fixtures |
Rural jurisdictions with small permitting staffs often take the longest on review. Submit early and respond to comments the same week they arrive.
DIY vs. Professional Contractor: A Decision Matrix
The DIY versus professional decision usually comes down to three variables: what your jurisdiction requires to be licensed, what your insurer and lender will allow, and what you can physically and safely execute. Most owner-builders land on a hybrid, hiring out the structural and licensed trades while handling insulation, painting, and finish work themselves. The rubric below is built to get you to that decision quickly.
The Three-Question Filter
Before you evaluate any individual task, answer these:
- Does the jurisdiction require a licensed trade for this work? Electrical, plumbing, and structural work almost always do. If a permit inspection requires a licensed signature, DIY is off the table regardless of your skill.
- Will your lender or insurer fund or cover it? Construction loans often require a licensed general contractor of record. Some insurers will not write a policy on an owner-built structure without an engineer’s certification.
- Does the task carry fall, crane, or structural-collapse risk? If yes, the answer is professional, full stop. Steel erection and roof panel installation at height are the two tasks where DIY attempts most often end in injury or a failed inspection.
Task-by-Task Decision Matrix
| Task | DIY Feasible | Professional Required | Why |
|---|---|---|---|
| Site survey and grading plan | No | Yes | Licensed surveyor needed; recorded plat |
| Geotechnical report | No | Yes | Licensed engineer; drives foundation design |
| Foundation and slab pour | No | Yes | Engineered footings, compaction testing, inspection |
| Steel erection | No | Yes | Crane operation, fall protection, bracing sequence |
| Panel installation | Sometimes | Often | Fall protection and warranty terms; some manufacturers void warranty on owner-installed panels |
| Insulation | Yes | No | Straightforward with guidance; blower-door test recommended |
| Electrical rough-in | No | Yes | Licensed electrician; inspection required |
| Plumbing rough-in | No | Yes | Licensed plumber; inspection required |
| Drywall and interior framing | Yes | No | Labor-intensive but low-risk |
| Painting and finish carpentry | Yes | No | Cosmetic; no permit implications |
| HVAC installation | No | Yes | Licensed mechanical contractor; load calculation required |
What the Hybrid Path Actually Looks Like
A common pattern among owner-builders is to act as their own general contractor, hiring and scheduling the licensed trades, while doing the unlicensed labor themselves. This can reduce total cost meaningfully, but it shifts risk onto you:
- Scheduling risk, you own the sequence. If the electrician is late, the drywall crew is idle, and you eat the delay.
- Warranty risk, some panel and kit manufacturers require installation by an approved crew to honor the finish or weather-tightness warranty. Confirm this before you decide to install panels yourself.
- Insurance risk, owner-builder policies exist but are narrower than a general contractor’s policy. Verify coverage before breaking ground.
- Financing risk, many construction lenders disburse funds only against a licensed contractor’s draw requests. An owner-builder draw schedule may not qualify.
When to Hire a General Contractor Instead
Hire a GC when any of the following is true:
- Your lender requires a licensed contractor of record
- Your jurisdiction requires a licensed GC for residential permits
- You live more than an hour from the build site and cannot supervise daily
- The project includes complex structural elements (large clear spans, mezzanines, heavy equipment loads)
- You have no prior construction management experience and the schedule is tight
The DIY decision is not about saving money on labor, it is about which risks you are willing to own. Licensed trades, structural work, and anything requiring a crane or fall protection belong to professionals. Insulation, painting, and finish work are where owner-builders get the most savings for the least risk.
Frequently Asked Questions
How long does the metal building home construction process take from start to finish?
Most metal building homes take 6 to 10 months from foundation to move-in, depending on size, weather, and contractor availability. The erection phase itself is fast, often 2 to 4 weeks for the shell, but interior finishing and inspections add months.
Do metal building homes require specialized contractors for assembly?
Yes, the erection phase usually requires a crew experienced with pre-engineered steel and truss assembly. General contractors who only build wood-frame homes may not have the right equipment or knowledge for load-bearing steel connections. When hiring a general contractor for barndominiums, ask for proof of prior metal building projects and confirm they carry insurance for steel erection work.
What are the common building code considerations for steel-framed residential structures?
Steel-framed homes must meet local building codes for load requirements, wind uplift, and seismic zones. You will need stamped architectural design drawings and engineering calculations for permits. Insulation R-value minimums vary by climate zone, and some jurisdictions require additional moisture control detailing. Always verify zoning compliance and HOA rules before finalizing your plans, since some areas restrict metal exteriors.
Can I insulate and finish the interior of a metal building home myself?
You can handle some interior finishing tasks like painting, flooring, and trim work, but insulation installation is best left to professionals. Metal building insulation and interior finishing require careful attention to thermal bridging and moisture control. Spray foam or rigid foam boards are common choices, and improper installation can lead to condensation and corrosion. Hire a specialist for the building envelope, then take on cosmetic work yourself to save money.